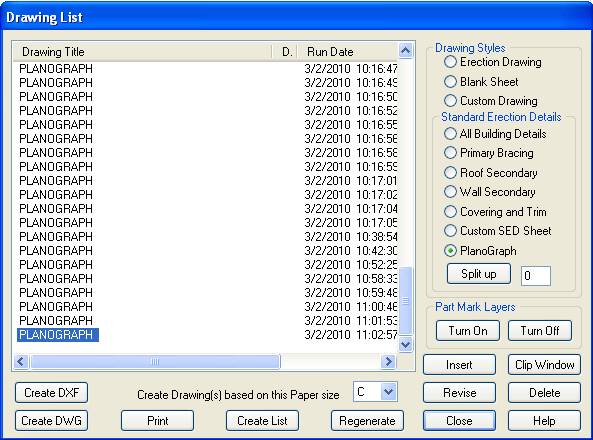
Inserting Planograph Drawings
(Rev: 06/17/10)
1. Open
Drawing Editor
2. Insert
Planographs if not already done
3. Select
last planograph then hit Insert
button
![]()
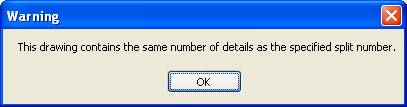
4. The
following window will appear, hit OK
5. Scroll
to bottom of drawing list and select the last PLANOGRAPH drawing on the list.
This is the drawing you just inserted. Hit the Revise button.
![]()

6. After
hitting the Revise button, the following window will appear, there may be a
short delay before it is displayed. The EMF files being displayed are ALL the
planographs from the kits for this order. Any planographs you may have manually
added will not be on this list. Hit the Delete
All button to remove all the planograph drawings.
![]()


7. Once
the list has been deleted, hit the Insert
button
![]()

8. The
following window will then appear.
You will need to change the Look
in box. It will by default be looking in the Brand Vision/details folder
but you need to map it to look in Brand Vision/Brand/Details.
All the planograph drawings are preceded
by the letter P- as shown below.
![]()
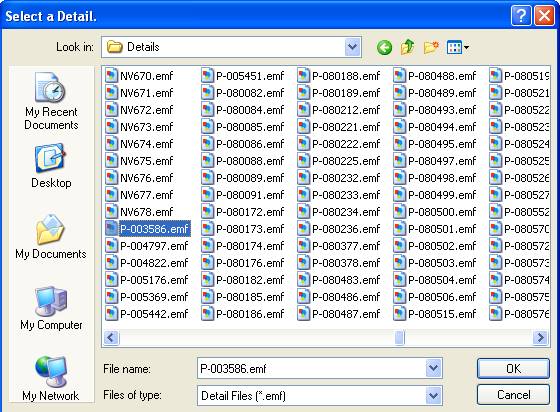
9. Select
the planograph you need and hit the OK button. This places the planograph at the
bottom of your drawing list. This only allows a single planograph drawing to be
added at a time.